How to Layout a Pantry That Is Both Useful and Well-Organized
How to Layout a Pantry That Is Both Useful and Well-Organized
The creation of a pantry requires careful planning in order to make the most of the available space for storage, accessibility, and organization. By adhering to these instructions, you will be able to establish a well-designed pantry that caters to your needs and improves the operation of your kitchen.
First, determine the available space and your requirements.
First things first, assess how much room you have available for your pantry. Take careful measurements, making sure to account for height, width, and depth. Take into account the requirements and routines of your household. Do you mostly store dry products, canned goods, or home appliances in your storage space? Once your needs are established, the size and configuration of the pantry may be determined more accurately.
Step 2: Select an Appropriate Location for the Pantry
Choose a spot that's easy to get to and offers plenty of convenience for your pantry. A closet or alcove close to the kitchen, or even a walk-in pantry if there is enough room, are all common solutions for food storage. Make sure the area you choose is conveniently accessible and has adequate lighting.
Step 3:Determine the Type of Pantry and Its Layout.
Make a decision regarding the kind of pantry that will work best in the area you have and with your requirements. Among the choices are:
A pantry that resembles a shallow closet and has shelves and doors is called a reach-in pantry.
A walk-in pantry is a larger space that offers additional storage and has the option to incorporate shelving, drawers, and even a countertop into its design.
Pull-Out Pantry: A pantry that makes use of confined spaces by deploying pull-out shelves or baskets to facilitate access.
Built-In Cabinetry is tailor-made cabinetry that is installed invisibly into your existing kitchen plan.
Step 4:Shelving and storage solutions need to be planned out in.
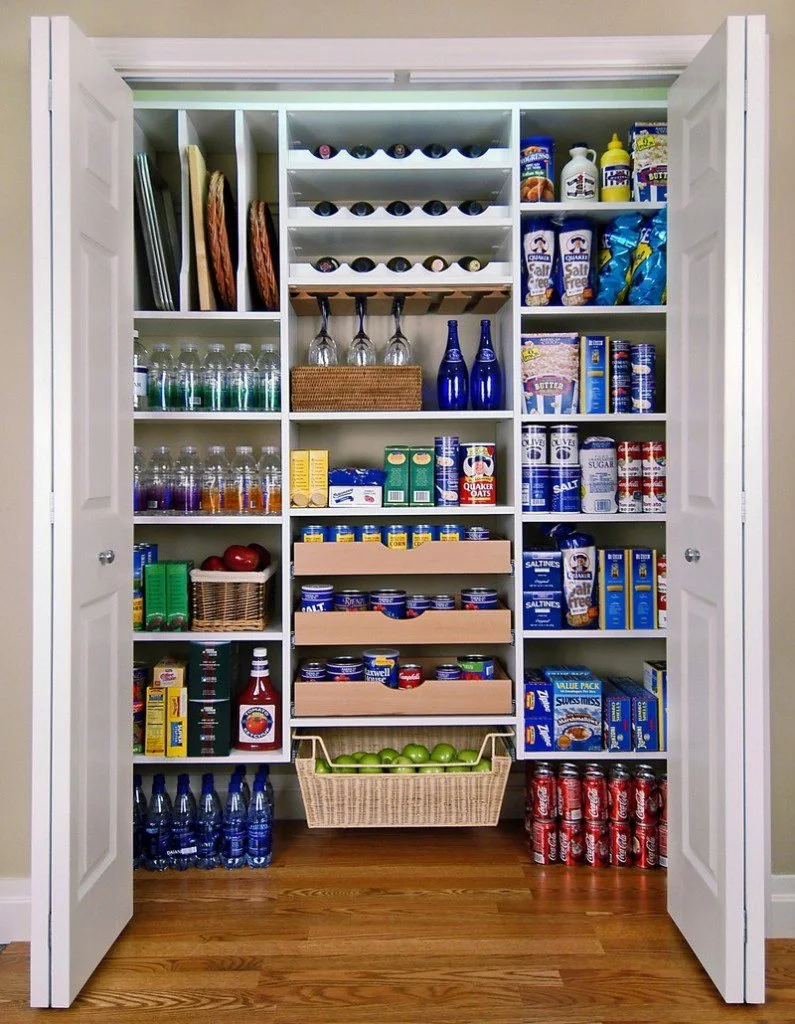
Create shelves that can be adjusted to fit a variety of different item sizes. It might be helpful to place pull-out drawers or baskets on the shelves so that goods towards the back can be reached easily. Include specialized solutions for storage, such as racks for storing spices and wine, as well as hooks for hanging utensils and mugs.
Step 5: Increase Your Site's Visibility and Accessibility
Put easy access and visibility at the top of your list. Put things that are used regularly at eye level, and put things that are used less frequently higher or lower. Make it simple to determine the contents of a container by using transparent bins, labels, and storage containers. In order to adequately illuminate the interior of the pantry, install sufficient lighting, such as motion-sensor LED lights.
Step 6: Consider Your Options Regarding the Pantry Door
You can go with a more conventional door that swings open and closed, a sliding barn door, or a pocket door, depending on the size and layout of your room. You may add a beautiful touch to your pantry by installing a glass or frosted door, which also enables you to see what's within.
Step 7:Choose the materials and finishes.
Choose materials that have an aesthetic that works well with your kitchen. Choose shelving that is not just solid but also easy to clean, and hardware that will last. Think about choosing finishes for your kitchen cabinets and flooring that go well together.
Step 8:Create an Organizational System for the Pantry.
Create a method of organization that classifies things in a way that makes sense. Put products that are the same kind together, including baking supplies, canned goods, snack foods, and the basics for cooking. In order to keep everything organized, you should make use of clear bins, containers with labels, and shelf dividers.
Step 9:Make plans for bulk storage.
Make room for the long-term storage of non-perishable items like rice, pasta, and cereal in large quantities. Think about getting special shelves or containers for these things. Check that the area is clear of clutter and easy to navigate at all times.
Step 10: Customize It with Your Touch and Your Style
Add some of your own unique touches to the décor of your pantry. Thought should be given to installing ornamental wallpaper, a blackboard or corkboard on which to jot down reminders and grocery lists, or perhaps a small seating space.
Step 11:Consult with Competent Individuals.
Consult with a professional designer or builder if you do not feel confident in your ability to create or construct something. They are able to provide expert guidance, draw up thorough blueprints, and guarantee that your pantry complies with all applicable safety regulations and building codes.
Step 12:Design plan into action.
Once you have the design plan in hand, you can begin constructing or remodeling your pantry. Install shelving, cabinetry, and other storage options in accordance with the layout you have chosen. Check that everything is properly aligned and that it is all firmly attached.
Step 13:Arrange and stock your pantry.
Once the building is finished, you may begin organizing your pantry according to the system you had previously decided upon. Label the containers, organize the things, and make sure that everything has its own specific location.
Step 14:Routine maintenance and evaluations.
Reassess your needs on a regular basis and make any necessary adjustments to the organization of your pantry. Maintaining a room that is useful and orderly requires that you clean and clear away clutter on a regular basis.
The Concluding Statement: Your Effortlessly Elegant Pantry
Putting Together Your Pantry: The Construction and the Choice of Materials
7.1 Collect All of the Required Equipment and components.
Before you start constructing your pantry, you need to make sure that you have all of the necessary tools and supplies on hand. You will require:
Plywood that has been sanded: When building sturdy shelves or structures, select plywood of a good grade.
Adhesive: When securely attaching components, use a wood adhesive that is of high strength.
Caulking Gun: Both the application of adhesive and caulking require the use of a caulking gun.
Sandpaper with a grade of 220 is ideal for use on smooth surfaces because of its finer grain.
Applying a primer is the first step in preparing surfaces for painting.
Paint: Choose a paint that will last for a long time and is simple to clean up in the color that you want.
Finish Nails: When attaching components like trim or moldings, use finish nails instead of regular nails.
The use of accurate measurements is absolutely necessary for the completion of precision construction.
7.2 Assembling the Shelves and the Structure of the Pantry
To construct your pantry shelves and the structure around them, follow these steps:
Measure and Mark: Using your tape measure, make markings on the sanded plywood that correspond to the measurements of the pantry shelves you will be installing.
Cut the Plywood: Using a saw, cut the plywood very carefully along the lines that have been drawn. Make sure the cuts are clean and straight.
To put up the shelves, first apply wood adhesive to the edges of the plywood, and then join the individual pieces of plywood together. While the adhesive is drying, use clamps to hold the parts together so they don't fall apart.
Add Supports: To ensure the shelves' continued stability, install vertical supports in the spaces between them. Make sure the supports are straight and stable by checking them with a level.
Install Backing: If you would like, you can install a backing made of plywood at the back of the shelves. This will provide additional stability and prevent items from falling through.
7.3 Putting the Final Touches on and Painting
Once construction of the structure is complete, the following procedures should be followed in order to finish and paint it:
Sand the Surfaces: If there are any rough edges or surfaces on the pantry shelves, use sandpaper with a grit of 220 to smooth them off.
Apply Primer: All surfaces that are going to be painted should have a coat of primer applied to them beforehand. The adherence of the paint is improved, and the overall finish is improved by using primer.
Paint the Pantry: After the primer has had enough time to dry, begin painting the pantry in the color of your choice. If you want an even and smooth finish, use either a paintbrush or a roller.
Apply Additional coats. You may need to apply additional coats of paint in order to achieve the color and finish that you want, so keep this in mind. Wait for each layer to dry completely before proceeding to the next.
Seal with a Clear Finish (Optional): If you want the painted surfaces to last longer, you might think about applying a clear finish or sealer to them. This will preserve them from wear and strain. Where to Purchase Materials for the Construction of a Pantry
8.1 Your Neighborhood Hardware and Home Improvement Centers
Pay a visit to the home improvement centers or hardware stores in your neighborhood, such as Home Depot, Lowe's, or Ace Hardware. These stores have a comprehensive selection of the building materials, equipment, and supplies that you will require for your pantry renovation project.
Planning, organizing, and paying close attention to detail are all essential components in the design of a pantry. You can design a pantry that improves the functionality of your kitchen and complements your lifestyle by evaluating the space you have available, taking your requirements into account, and putting in place intelligent storage options. You will have an easier time preparing meals, less clutter in the kitchen, and a more organized space overall if you have a well-designed pantry in your home. This will also add value to your property. Investing your time and energy into building the pantry of your dreams will pay you in the form of improved productivity in the kitchen as well as an increase in the pleasure you derive from meal preparation tips. #DIYPantry #KitchenOrganization #HomeImprovement #BuildingMaterials #ConstructionTips #FunctionalDesign #KitchenUpgrade #DIYProjects #Craftsmanship #InteriorDesign